Tuesday, June 30, 2015

Skillet Apple Charlotte

"Out of France", the theme for this week at I Heart Cooking Clubs (IHCC). We are heading out of France with Jacques Pepin to explore other delicious cuisines from other countries. I'm making Jacques Pepin take on Apple Charlotte, a dessert which dates back to 15th-century England, where this dessert was named after Queen Charlotte, wife of King George III. (And now there's a Princess Charlotte and Prince George, real cuties!).  (Note : an update : hi-lighted by Mae Travels in the comment below that King George III was born in 1738, so the 15-th century info is inaccurate! Sorry about that, I got that info from food.com when I googled for Apple Charlotte! Thank you Mae!)

Originally this apple dish consisted of lining a ring mould with bread and filled with apples, with the dish being served hot. Jacques Pepin version is to use a skillet to cook the apples over a hot stove until caramelized, and top with bread slices, baked in the oven until brown.


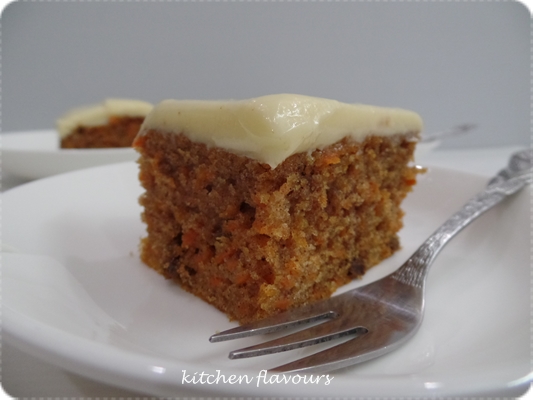
Skillet Apple Charlotte, with yummy caramelized apple wedges.


Firstly, apples (I've used Fuji), are peeled, cored and cut into wedges, arrange them in a non-stick skillet or ovenproof pan. Some butter, maple syrup and honey are added in. I have used all honey as I do not have any maple syrup. Bring it to a boil over high heat, turn down heat to low, cover and cook for about 5 minutes until apples are just tender. Uncover and cook over high heat for 4 to 5 minutes, or until the liquid is completely gone, then continue to cook for another 2 minutes until the apples are caramelized. But by the time the apples are caramelized, there's still some liquid in the pan, and fearing that the already caramelized apples will get bitter if I continue to cook it longer, I have poured off the liquid into a small bowl, reserving it to be used later, if I need to. 

Four slices of white bread are trimmed off the crust, trim on one side of each slice to a rounded shape, so that they form a rough disc when arranged on top of the apples in the skillet. Butter one side of the bread slices, and place the buttered side up on the apple wedges. Sprinkle some sugar (I've used about 2 teaspoons) over the bread slices. Bake in the preheated oven at 400 degrees for 15 minutes until the bread is browned. I have used a non-stick ovenproof saucepan which can withstand the maximum temperature of 180C, so I have baked the Apple Charlotte at 180C for 15 minutes on the middle rack, and move it up to the upper rack for another 10 minutes until the bread is brown and crispy.


When the Skillet Apple Charlotte is done, I left it to cool just a little (about 3 minutes) in the saucepan, then I unmould it onto a plate. Spread some apricot preserves over the apples. I have used my homemade orange jelly instead and have mixed it with the reserved liquid which I retain from the apples earlier on. The saucepan is still very hot, so I poured back the reserved liquid into the pan, add about 4 tablespoons of orange jelly, stir to combine. There's no need to heat the saucepan, as it still has the heat from the oven. Be careful when handling the hot saucepan! (Ouch!!). Pour this mixture over the apples, sliced into four servings and serve immediately.


This is so yummy! The bread is very crispy and the caramelized apples are tender and delightful. At first I thought that it would be sweet, with the honey and the sprinkling of sugar over the bread slices. But it blends out really well, without being overly sweet, just right, even with the orange jelly. I'll be making this again! A delicious way of using up the balance of one and a half jars of my homemade orange jelly lying in the fridge.

I made this in the afternoon for tea-time for both my daughter and me. We were both really hungry as we had eaten a late breakfast and have skipped lunch. My initial plan is to eat this with my homemade creme fraiche, but I have completely forgotten about it. Daughter had two slices, and I had one, only because I'm keeping the other slice for my son. When he came back from school a little while later, he ate it with a scoop of my homemade caramel ice cream! Now, why didn't I think of that!  


Skillet Apple Charlotte
(adapted from "More Fast Food My Way", Jacques Pepin)
(4 servings)
3 Granny Smith apples (about 1-1/2 pounds total) (I use 2 medium Fuji apples)
3 tablespoons unsalted butter
2 tablespoons maple syrup
1 tablespoons honey
4 slices white bread
1 teaspoon sugar (I've used 2 teaspoons)
3 tablespoons apricot preserves
about 1/2 cup sour cream or Greek yoghurt (optional)

Preheat the oven to 400 degrees. Peel, core, and cut each apple into 6 wedges. Put the wedges in a small (7 to 8-inch) nonstick skillet and add 2 tablespoons of the butter, the maple syrup, and the honey. Bring to a boil over high heat. Cover, reduce the heat to low, and cook for about 5 minutes, or until the apples are just tender. Uncover and cook over high heat for 4 to 5 minutes, or until the liquid is completely gone, then continue cooking for another 2 minutes or so to glaze and caramelize the apples. 

Trim the crusts from the bread slices and arrange them touching, in a square on a cutting board. Trim the corners to create a rough disk that will fit into the skillet and cover the apples. Butter the bread on one side with the remaining 1 tablespoon butter and arrange the slices buttered side up on top of the apples. Sprinkle on the sugar and place the pan in the oven. Bake for about 15 minutes, or until the bread is nicely browned on top.

At serving time, if necessary, reheat the dessert on top of the stove to help loosen the apples and unmold the charlotte onto a serving platter. If the apricot preserves are firm, heat them for 30 seconds in a microwave oven to soften. Pour and spread them on top of the apples. Serve the dessert in wedges as is or with a couple of tablespoons of sour cream or Greek yoghurt, if you like.


I'm linking this post with I Heart Cooking Clubs (IHCC), theme for this week 
"Out Of France"


and

Cook-Your-Books


Saturday, June 27, 2015

Banana Blondie

These blondies are delightful, the white version of brownies, using white chocolate. They are moist, soft, tender, with a velvety texture from the melted white chocolate in the batter. I have reduced the sugar rather drastically, as the bananas and white chocolate are already sweet! On top of that, I have replaced the brazil nut toffee with chocolate chips, as suggested by the author. Originally, the recipe has given the instructions on how to make the brazil nut toffee, which is broken into pieces and added into the batter, but the author has mentioned that these can be substituted with chocolate chips instead, and I have opted for this easy way!


Chunky bananas and chocolate chips in a moist velvety white chocolate blondie.


The recipe below is the adaptation for using chocolate chips instead of brazil nut toffee. To make the brazil nut toffee, please refer to the original recipe here.

Banana Blondie
(adapted from "Short & Sweet", Dan Lepard)
225gm caster sugar (I use 100gm)
100gm dark chocolate chips
oil for the tray
100gm unsalted butter
200gm white chocolate
1 egg
2 bananas, peeled and chopped (about 200-250gm total)
2 teaspoons vanilla extract
225gm plain flour
1 teaspoon baking powder

Line the base and sides of a 20cm square tin with foil and heat the oven to 190C/170C fan/375F/gas 5. Heat the butter with the white chocolate in a pan over a low heat until melted then scrape into a bowl, add the sugar and beat with the egg, bananas and vanilla until smooth. Sift the flour and baking powder together and fold through the butter mixture with the chocolate chips. Spoon into the tin and bake for 35 minutes until "wobbly" set and golden on top. Leave till stone cold before slicing.


I'm linking this post with :

Cook-Your-Books

Wednesday, June 24, 2015

Quick Chicken Korma and South Indian Cabbage

"June Potluck", the theme for this week at I Heart Cooking Clubs (IHCC). We may cook from any of IHCC list of 12 chefs. Since I have the craving for some Indian meal, I turned to Madhur Jaffrey's books, and made two dishes for our weeknight dinner. 


I've made these two dishes, Quick Chicken Korma and South Indian Cabbage, served alongside some basmati rice. 

For the rice, I sauteed some cardamom pods, cloves and fresh curry leaves in a little oil until fragrant, add in the basmati rice (washed and soaked for 20 minutes, drain before used). Stir for a minute or two, till the rice is fragrant from the spices, transfer the rice to the rice cooker pot, add some water and cook accordingly (2 cups rice with 3-1/3 cups water). Please remember to discard the whole spices before serving, they are not meant to be eaten.


Quick Chicken Korma is pretty easy to cook and is delicious. I've used about 1.2 kg of chicken pieces, and only 1 can of chopped tomatoes instead of 3 cans of plum tomatoes, and it tasted really good with only 1 can. And for the spices, as usual I have increased some of the spices slightly, as I love bold flavours in my curries. Some cream is added at the end of cooking time, and the curry is cooked on high heat for the last couple of minutes until the sauce thickened. 


South Indian Cabbage is a veggie dish that I have cooked quite a number of times, usually as a side dish to serve with one of Madhur Jaffrey's curries. It uses asafoetida, a pungent spice and the smell is not what one would call pleasant. But once it is introduced into hot oil, it is somewhat aromatic and really brings a certain flavour to a dish. So do not be afraid to use a generous pinch, the dish needs it. 
Be sure to have all the ingredients ready as everything goes into the wok, in succession rather quickly. I've used yellow split peas which turned a little hard after frying in the hot oil together with the spices, but it is really nice, a nutty contrast with the wilted cabbage and I love it actually. This dish is further enhanced from the fresh fragrant curry leaves, from my garden pot. This is a really tasty veggie dish, and it makes a perfect accompaniment of any curry dish along with some white fluffy rice. 


Quick Chicken Korma (Murgh Korma)
(adapted from "100 Essential Curry", Madhur Jaffrey)
Serves 4
4 cm (1-1/2 in) piece fresh ginger, peeled and coarsely chopped
5-6 garlic cloves, peeled and coarsely chopped
6 tablespoons vegetable oil
3 bay leaves
5 cm (2 in) cinnamon stick
8 cardamom pods
4 cloves
1/4 teaspoon black cumin seeds
120 gm (4-1/2 oz) onions, peeled and finely chopped
1 tablespoon ground coriander (I use 2 tablespoons)
1 tablespoon ground cumin (I use 2 tablespoons)
3 tinned plum tomatoes, chopped (I use 1 can chopped tomatoes)
1.5 kg (3 lb) chicken pieces, skinned and cut into serving portions
1/4-1 teaspoon chilli powder (1 use 1 tablespoon)
1/4 teaspoon salt
3 tablespoons single cream

Put the ginger, garlic and 3 tablespoons water in the container of an electric blender. Blend until you have a smooth paste. (I use a pestle and mortar to pound into a paste).

Put the oil in a wide frying pan or saute pan and set over high heat. When very hot, put in the bay leaves, cinnamon, cardamom pods, cloves and cumin seeds. Stir once or twice and add the onions. Stir and fry for about 3 minutes or until the onions turn brownish. Add the paste from the blender, and the ground coriander and ground cumin, and fry for a minute. Add the chopped tomatoes and fry another minute. Add the chicken pieces, chilli powder, salt and 250ml (8fl oz) water. Bring to a boil. Cover, turn the heat to medium and cook for 15 minutes, turning the chicken pieces over now and then.

Remove the cover, add the cream and cook on high heat for another 7-8 minutes or until the sauce has thickened. Stir gently as you do this.


South Indian Cabbage (Dakshini Band Gobi)
(adapted from "World Vegetarian", Madhur Jaffrey)
1/4 cup peanut or canola oil
generous pinch of ground asafoetida
1 teaspoon whole brown mustard seeds
1 teaspoon urad dal, chana dal, or yellow spilt peas
5 to 6 whole fenugreek seeds
2 to 3 whole dried hot red chillies
10 fresh curry leaves, if available, (use fresh basil leaves as substitute)
1-3/4 pounds fresh green cabbage (about 1/2 large head), with its hard core removed and then shredded (as in coleslaw)
1 to 1-1/4 teaspoons salt

Put the oil in a large wok or large, wide pan and set over medium-high heat. When hot, put in the asafoetida. A second later, put in the mustard seeds and urad dal. As soon as the mustard seeds start to pop, a matter of seconds, put in the fenugreek seeds and red chillies. Allow the dal to get red and the chillies to turn dark. Now put in first the curry leaves and then the cabbage and give a few quick stirs. Add the salt. Stira and cook for a minute. Cover, turn the heat to low, and cook for 6 to 8 minutes, or until the cabbage has wilted completely. (You may add a sprinkling of water, if needed). Uncover and taste for salt. Stir and cook for another minute or two.


I'm linking this post with I Heart Cooking Clubs (IHCC), theme for this week 
"June Potluck"


and

Cook-Your-Books


Sunday, June 21, 2015

Carrot Cake with Cream Cheese Frosting for Happy Father's Day

Happy Father's Day to all fathers! My daughter made this cake this morning for her daddy, Carrot Cake with Cream Cheese Frosting. She made the cake and I made the frosting, and daddy did the eating.. !! We helped daddy with the eating, of course!! hahaha!


We made only half a recipe and have reduced the sugar too. Since the hubby is avoiding nuts, I have replaced the nuts with raisins. The cake is baked in a 7" square baking pan and took 33 minutes to bake till done.

And for half a recipe of the frosting, I have used only 1 cup of powdered sugar instead of two cups, (meant for half a recipe), and it works out great to a spreading consistency.


Cake is moist, soft and delicious! (You did a superb job, girl!) Goes perfectly with cream cheese frosting. Yummy! Thumbs up from daddy and everyone!


Happy Father's Day!!


** my adjustments for half a recipe is listed in blue. I've used a 7" baking pan.
Carrot Cake with Cream Cheese Frosting
(adapted from "Betty Crocker : The Big Book of Cakes")
Cake :
1-1/2 cup granulated sugar (1/2 cup)
1 cup vegetable oil (1/2 cup)
3 eggs (1-1/2)
2 cups all-purpose flour (1 cup)
2 teaspoons ground cinnamon (1 teaspoon)
1 teaspoon baking soda (1/2 teaspoon)
1 teaspoon baking powder (1/2 teaspoon)
1 teaspoon vanilla (1/2 teaspoon)
1/2 teaspoon salt (1/4 teaspoon)
3 cups shredded carrots (5 medium) (1-1/2 cups)
1 cup coarsely chopped nuts (replaced with 1/2 cup raisins)

Frosting :
1 package (8 oz) cream cheese, softened (120 gm)
1/4 cup butter, softened (30 gm)
2 to 3 teaspoons milk (1 teaspoon)
1 teaspoon vanilla (1/2 teaspoon)
4 cups (1 lb) powdered sugar (1 cup)

  1. Heat oven to 350F. Grease bottom and sides of 13x9-inch pan with shortening or cooking spray, lightly flour. (for half a recipe, I've used a 7" square baking pan, greased and lined with parchment paper)
  2. In large bowl, beat granulated sugar, oil and eggs with electric mixer on low speed about 30 seconds or until blended. Add flour, cinnamon, baking soda, baking powder, 1 teaspoon vanilla and the salt; beat on low speed 1 minute. Stir in carrots and nuts. Pour batter into pan.
  3. Bake 40 to 45 minutes or until toothpick inserted in center comes out clean. Cool completely, about 1 hour. (Using a 7" square baking pan, the cake is done at 33 minutes).
  4. For the frosting : In medium bowl, beat cream cheese, butter, milk and 1 teaspoon vanilla with electric mixer on low speed until smooth. Gradually beat in powdered sugar, 1 cup at a time, on low speed until smooth and spreadable. Frost cake. Store covered in refrigerator.


I'm linking this post with 

Cook-Your-Books


Thursday, June 18, 2015

Bacon Cheddar Scones : Bake-along #81

This week's Bake-Along #81, I have chosen to bake Bacon Cheddar Scones, from Bouchon Bakery cookbook, together with Lena and Zoe. Bouchon Bakery cookbook is one gorgeous book! It is huge and heavy, and I've got to clear my messy table each time when I want to browse thru this book, it needs the space! A little bulky to lay open on the kitchen counter while trying out a recipe, but that being said, it is worth every space it occupy on my bookshelf. 

According to the author, this savoury scone is their most popular scones at their bakery. I'm not surprised! There's cheese, bacon, cream and chives! What's not to love when they come together in one delicious savoury breakfast treat? Wish I could try them (and other goodies) from the bakery itself, well, maybe one day in the future!

These scones are pretty simple and easy to make, though a little advance planning is necessary. The dough is made the day before, shaped into scones, freeze and bake the following day. There's really not much work to it at all. The only "extra work" is the frying of the bacon and chopped them to pieces. I've used streaky bacon and fresh chives from my garden pot. The rest of the work is making the dough which is pretty easy, as it is done in the stand mixer. 

I've made my own creme fraiche, as I do not want to buy a pack for such a small amount needed. It is really easy to make at home. Here's how I make my own creme fraiche : To make 1 cup of creme fraiche, combine 1 cup of heavy cream with 1 tablespoon of yoghurt (I used my own homemade yoghurt, you can use buttermilk too). Stir to combine, cover tightly and let sit undisturbed at room temperature for at least 8 hours or until set. It can keep for about a week in the refrigerator.

The scone recipe used only 89gm (1/4 cup + 2-1/2 tablespoons) of creme fraiche, so I have placed a teaspoon of yoghurt in a cup, add heavy cream to make 89gm, stir and let sit for 8 hours. Once it has thickened and set, place in the refrigerator if not used immediately.


Once the dough is done, it is shaped into a 7-by-9-inch block, wrapped in plastic wrap and place in the fridge for about 2 hours until firm. The dough block is then cut in half lengthways and each half is cut into 6 rectangles. Place them on a baking sheet, spaced them apart, and place the baking sheet in the freezer overnight, until the scones are frozen solid. These frozen scones can remain frozen for about 1 month. (I love this, so convenient!).


On baking day, preheat the oven, place the frozen scone on parchment lined baking sheet, spacing them 1 inch apart, brush the top with cream, sprinkle some grated Cheddar cheese, and black pepper. Bake as directed, until golden brown.


Freshly baked scones. Smell incredibly delicious while baking!


Looks yummy!


These scones are delicious! Enjoy them while just barely warm, the cheddar cheese has formed a lovely crispy crust, and the insides are moist, tender, buttery and so, so tasty! Bacon, cheese, cream and chives, what's not to love? I baked only six and I have another 6 frozen scones in my freezer, which will be gone real soon! Love that these scones can be frozen ahead and can be baked anytime I want while still frozen solid. Make the full recipe and keep some in the freezer, great for lazy mornings. Just bake what you need, and you will have a delicious breakfast to enjoy with a cup of coffee. Perfect start to a busy day. 


Bacon Cheddar Scones 
(adapted from "Bouchon Bakery", Thomas Keller and Sebastien Rouxel)
107gm (3/4 cup + 1 teasoop) all-purpose flour
196gm (1-1/2 cup + 1/2 tablespoon) cake flour
8.1gm (1-1/2 + 1/8 tsp) baking powder
1.6gm (3/8 teaspoon) baking soda
27gm (2 tablespoon + 3/4 teaspoon) granulated sugar
3.6gm (1-1/4 teaspoon) kosher salt
132gm (4.7 ounces) cold unsalted butter, cut into 1/4-inch pieces
71gm (1/4 cup + 1 tablespoon) heavy cream, plus additional for brushing
89gm (1/4 cup + 2-1/2 tablespoons) creme fraiche
340gm (12 ounces) Hobbs applewood smoked bacon, cooked, drained, and cut into 1/8-inch pieces (77gm cooked weight)
144gm (2 cups) grated white cheddar cheese
36gm (1/2 cup) grated white cheddar cheese (for sprinkling before baking)
10gm (1/4 cup) minced chives
freshly ground black pepper

Place the all-purpose flour in the bowl of a stand mixer fitted with the paddle attachment. Sift in the cake flour, baking powder, baking soda, and sugar and mix on the lowest setting for about 15 seconds to combine. Add the salt and mix to combine. Stop the mixer, add the butter, and, on the lowest setting (to keep the flour from flying out of the bowl), pulse to begin incorporating the butter. Increase the speed to low and mix for about 3 minutes to break up the butter and incorporate it the dry mixture. If any large pieces of butter remain, stop the mixer, break them up by hand, and mix until just incorporated.

With the mixer running, slowly pour in the cream. Add the creme fraiche and mix on low speed for about 30 seconds, until all of the dry ingredients are moistened and the dough comes together around the paddle. Scrape down the sides and bottom of the bowl and paddle and pulse again to combine. Add the bacon, the 144 grams/2 cups cheese, and the chives and pulse to incorporate.

Mound the dough on the work surface and, using the heel of your hand or a pastry scraper, push it together. Place the dough between two pieces of plastic wrap and, using your hands, press it into a 7-by-9-inch block, smoothing the top. Press the sides of your hands against the sides of the dough to straighten them. Wrap the dough in plastic wrap and refrigerate for about 2 hours, until firm. 

Line a sheet pan with a Silpat or parchment paper. Cut the block of dough lengthwise in half and then cut each half crosswise into 6 rectangles (70gm each). Arrange them on the prepared sheet pan, leaving space between them. Cover with plastic wrap and freeze until frozen solid, at least 2 hours, but preferably overnight. (The scones can remain in the freezer for up to 1 month).

Preheat the oven to 325F (convection) or 350F (standard). Line a sheet pan with a Silpat or parchment paper.

Arrange the frozen scones 1 inch apart on the sheet pan. Brush the tops with cream and sprinkle with the remaining 36 grams (1/2 cup) cheese and black pepper. Bake for 24 to 27 minutes in a convection oven, 33 to 36 minutes in a standard oven, until golden brown. Set the sheet on a cooling rack and cool completely.

The scones are best the day they are baked, but they can be stored in a covered container for 1 day.


********************************

Do stop by Lena of Frozen Wings and Zoe of Bake For Happy Kids, and all our friends who has baked along with us in the linky below :

For our next Bake-Along, we will be baking "Theme : Lemon Bars". Please do join us, bake any lemon bars recipe and  link your post to our linky which will open from 9th till 18th July. Everyone is welcome to join us! Only current post please.


Photobucket


A friendly reminder when linking to our blog hop :
1. Please mention Bake-Along event in your own post linking direct to any of the hosts' post (JoyceLena or Zoe)
2. Please link only new and current post, PLEASE FOLLOW THE BAKE OR THEME provided by us. Unrelated post will be deleted.
3. Feel free to display our Bake-Along badge in your post.


Saturday, June 13, 2015

Full-of-Herbs Fish Cakes

"June Mystery Box Madness Challenge", the theme for this week at I Heart Cooking Clubs (IHCC). Each month, we were given a list of ten ingredients and must select at least three out of the ten ingredients to make a dish from any of IHCC's past or present featured chefs' recipes. 

The ten ingredients for this month are ; Any White-Fleshed Fish, Green Leaf Lettuce, Pine Nuts, Dill, Cheddar Cheese, Almond Extract or Liqueur, Blueberries, Cornstarch, Bell Pepper and Black Beans.


My selected MBM ingredients ; White-fleshed Fish (I used sole), Cornflour and Dill, to make Yotam Ottolenghi's, "Full-of-Herbs Fish Cakes. And I've served the fish cakes with the fourth MBM ingredient, Green Leaf Lettuce.


This is a full-of herbs fish cakes indeed! The herbs ; dill, coriander, basil, lime leaves, lemongrass and ginger. Chopped shallots and chopped garlic are first sauteed over a medium-low heat about 5 minutes, then all the chopped herbs are added in (minus the ginger), stir for about 2 minutes until aromatic. Remove and allow to cool. The herb mixture is so fragrant, the lime leaves gave a wonderful aroma that no other herbs can give, do not leave it out. Though it is not stated in the recipe which type of lime leaves that he uses, I have always used kaffir lime leaves for my cooking, a common ingredient over here in Malaysia. Kaffir lime leaves are so fragrant. And I do have two pots of kaffir lime plants in my potted garden. 

White-fleshed fish meat (boneless and skinless, I've used sole) are cut to chunks and process briefly in the food processor just so they are broken into small pieces. They are then added to the herb mixture, along with chopped ginger, half an egg, cornflour, ground coriander, fish sauce, lime zest, and salt. Shape into long portions, flatten a little, and fry in hot oil on both sides until cooked through. Recipe states to fry both sides for about 90 seconds, and place them on a baking tray, and finish off the cooking in the oven for a few minutes. I have omitted this step. Fish meat cooked pretty quickly, and lazy me do not want to wash an extra tray! So I have cooked the fish cakes on the stove over medium-low heat on both sides, turning them over a couple of times until they are cooked through. 


Serve them hot with a squeeze of lemon, and some green lettuce.


These were delicious. Very tasty and really fragrant from the kaffir lime leaves. These fish cakes taste the best when hot (as recommended in the recipe), as when they cool down to room temperature, they do get a little fishy! We ate these with rice as part of our dinner dish.


Full-of-Herbs Fish Cakes
(source from guardian.com, recipe by Yotam Ottolenghi)
2 tablespoons olive oil
4 shallots, peeled and finely diced
3 cloves garlic, peeled and crushed
30gm fresh coriander leaves, chopped
25gm, fresh dill, chopped
20gm fresh basil leaves, finely shredded (I've used Thai basil)
6 lime leaves, finely chopped
1 lemongrass stalk, bruised and finely chopped
1/2 tsp ground coriander
400gm haddock fillets (or other firm, white fish), skinless and boneless
10gm fresh ginger, peeled and finely ground
1-1/2 tsp fish sauce
1/2 tsp lime zest
1/2 egg, lightly beaten (use the other half for something else)
1 tbsp corn flour
salt
50ml sunflower oil
1 lemon, cut into wedges

Heat the oven to 180C/350F/gas mark 4. Heat the olive oil in a medium frying pan, add the shallots and garlic, and saute on a medium heat for 5 minutes. Turn the heat up to high, add the herbs, lime leaves, lemongrass and ground coriander, and cook for two minutes. Remove and allow to cool.

Cut the fish into rough chunks and place in a food processor. Blitz in a few pulses, just until it's broken down into approximately 0.5-1cm pieces - take care not to over-process.

In a large bowl, mix together the oniony, herby mass from the pan, the fish, ginger, fish sauce, lime zest, egg and corn flour and add a quarter-teaspoon of salt. Split the mix into 40gm portions, form each into a long 8cmx4cm kebab, and gently flatten a little.

Heat the sunflower oil in a large frying pan on medium heat. Fry the fish cakes in batches for about 90 seconds on each side, until lightly golden. Transfer to a baking tray and place in the oven for about two minutes to cook through. Serve hot with a wedge of lemon.


I'm linking this post to I Heart Cooking Clubs (IHCC), theme for this week, 
"June Mystery Box Madness Challenge"


Tuesday, June 9, 2015

Chocolate-Cherry Brownies (TWD)

Tuesdays With Dorie (TWD) is currently baking from "Baking Chez Moi", by Dorie Greenspan., and the selected recipe for this week is Chocolate-Cherry Brownies.  

This recipe uses dried cherries which is boiled in a mixture of a couple tablespoons of red wine and water until the cherries has soaked up most of the liquid, then left to cool before using. I do not have any opened bottle of red wine, so I have used kirsch instead. 


Moist, plump dried cherries after it has soaked up all the kirsch and water, smells really nice.


Just like most brownies, they are really easy to make, without the need of a stand mixer. Everything is mixed in a bowl. I used dark chocolate, most of it is melted together with the butter, and the balance is chopped to fine pieces to be mixed into the batter later. One interesting ingredient is the usage of ground black pepper. Though I can't taste it in the baked brownie, it is an interesting ingredient to be added to a brownie! I've reduced the sugar slightly, used  only 120 gm and have added a teaspoon of vanilla extract even though it is not stated in the recipe.


According to the recipe, the brownie is baked for 27-29 minutes until the top is uniformly dull. Mine took a little longer, as the centre is still shiny, soft and not cooked. It was done at 35 minutes, when a thin knife inserted in the centre come out almost clean, and the top of the brownie is dull and crisp.


I made these brownies in the evening and left it to cool in the pan overnight. They were sliced on the next day. They were easy to slice, though the next time I would cut the cherries in half, as they were quite big and plump!


These brownies are so yummy! With a layer of crisp top, the insides are moist, fudgy and so chocolaty delicious, with the melted bits of chocolates in it! I love to bite into the moist, plump cherries, which I could detect a faint fragrance of the kirsch. Chocolate and cherries, they are a perfect combination! 

I'm linking this post with Tuesdays With Dorie (TWD). 


and
 photo 77951578-1914-4b72-8eda-9e40a91183ac_zps331eb4b4.jpg


Sunday, June 7, 2015

Cook-Your-Books #24

Cook-Your-Books is all about cooking or baking from your many cookbooks or magazines that you have collected over the years. If you love collecting cookbooks, read them like novels and love trying out new recipes, then this is the perfect place to share. It's time to get those books (or magazines) out of the shelves, and start using them. Bake or cook anything from any of your books or magazines, and link your posts to Cook-Your-Books here at Kitchen Flavours. The linky will start on the 7th of every month right up to the end of the month. The three most viewed submissions will be featured at the next Cook-Your-Books.


 photo 77951578-1914-4b72-8eda-9e40a91183ac_zps331eb4b4.jpg


Featured posts for this month
The three most viewed posts from Cook-Your-Books #23


Walnut Brownies
by Spice Up My Kitchen


Scrambled Eggs
by Life Can Be Simple


Thank you everyone for sharing all the delicious dishes and bakes from your cookbooks!

It's now time to link-up!

A little note when submitting your post to Cook-Your-Books
  1. Linky for submissions will start on the 7th of every month right up to the end of the month. The submission with the most views will be featured at the next Cook-Your-Books.
  2. All submissions must be new and current posts, within the current month. Old posts will be deleted. Please link directly to your post, not your homepage.
  3. Please mention from which book or magazine you are cooking or baking from, as this is a cooking/baking event using recipes from cookbooks and magazines.
  4. Please mention Cook-Your-Books in your post and link it back to Kitchen FlavoursYou may display Cook-Your-Books badge anywhere in your post.
  5. Please leave a comment after you have linked.
  6. It would be great if you could visit at least one link, everyone loves visitors.

Link-up with Cook-Your-Books #24 from 
7th - 30th June 2015


Thursday, June 4, 2015

Croissant : Bake-Along #80

Bake-Along #80 theme bake is "Croissant", selected by Lena, to bake together with Zoe, myself and anyone who wishes to bake-along with us. When Lena suggested Croissant as our bake-along, I have mixed reactions to it, LOL! Firstly, croissant has been on my list for ages. This very "leceh" (troublesome!) yeasted pastry is a challenge indeed to make in our super hot blazing weather and I'm not sure whether I could pull it through. But I would love to give it a try, so why not! And tried it I did, a total of 4 times! And I failed in all tries!

Croissant is a yeasted pastry with a layer of butter enclosed in between two layers of yeasted dough. It is then rolled and folded (laminating process), which is repeated three times, then the final rolling to a very thin layer, cut to triangles and rolled into croissants. In between all the rolling and folding, the dough has to be refrigerated to keep it cool at all times. Some of the recipes requires that in the initial stage, the dough need to be refrigerated overnight, before it is rolled and folded the next day. Then again, before the final rolling and cutting, the dough is refrigerated once again overnight. It takes about 2-3 days, depending on the recipe, to make a batch of croissant. 

The first recipe I tried, the yeast did not rise at all. What a bummer! The second time I  made it using a different recipe (Bourke Street Bakery), I made half a recipe. During the laminating process, the butter leaks out, and I am unable to roll it out, even when I tried patching it with flour. In the end, I baked the croissant as squares as I did not manage to roll it out thinly. It was really ugly, but my goodness, it tasted awesome! The top is all crispy with soft chewy bread-like centres, and deliciously buttery! 

Dissatisfied, I tried making it again with the same recipe, but again, the butter softened really fast, even though I refrigerated the dough very often in between rolling, and was extra careful with the rolling. I failed again and that dough landed in the bin. After wasting a few bars of butters, and the time spent on it, I was feeling very frustrated, and asked Lena how her croissant was. Lena gave me the link to this recipe and I thought that whether successful or not, I'll just try this one more time. I was glad that this is a small recipe, it is easier to handle.


I did manage to roll it out thinly, cut it and shape into croissants.


.... and baked them till golden brown.


but I am not satisfied with this at all. These are far from perfect!

I love eating croissants and I'm not giving up on my attempt to make them again. There are many areas for me to improve. Making these yeasted pastry in our hot weather is very, very, challenging, and very, very, frustrating! I will have to make a few adjustments to that! 

Anyone interested to try your hands at making this really challenging Croissants? Please do! Join us, and link your post in our linky below.

I'm not giving the recipe, but if you would like to give it a try, you can find it here.


********************************

Do stop by Lena of Frozen Wings and Zoe of Bake For Happy Kids, and all our friends who has baked along with us in the linky below :

For our next Bake-Along, we will be baking "Bacon Cheddar Scones", from Bouchon Bakery, pg 72, or here. Please do join us, link your post to our linky which will open from 18th till 27th June. Everyone is welcome to join us! Only current post please.


Photobucket

A friendly reminder when linking to our blog hop :
1. Please mention Bake-Along event in your own post linking direct to any of the hosts' post (JoyceLena or Zoe)
2. Please link only new and current post, PLEASE FOLLOW THE BAKE OR THEME provided by us. Unrelated post will be deleted.
3. Feel free to display our Bake-Along badge in your post.


Tuesday, June 2, 2015

Mini Croques-Monsieur

"Fromage S'il Vous Plait!" (Cheese If You Please), the theme for this week at I Heart Cooking Clubs (IHCC). I've made Mini Croques-Monsieur, which according to Jacques Pepin, these mini sandwiches can be prepared ahead and baked as needed for a large party or wedding reception. Well, I made this for our afternoon light lunch.


Ham slices and cheese are sandwiched between two slices of white bread, which is buttered and toasted till brown and crispy.  I've used yellow cheddar cheese.


Cut into mini squares to serve. My kids rather enjoyed these cute little mini sandwiches.


Mini Croques-Monsieur
(adapted from "More Fast Food My Way", Jacques Pepin)
makes 6 mini sandwiches

Arrange 2 thick slices white bread next to one another on the counter and cover 1 slice completely with slices of cheese. Add 1 slice ham to cover the cheese and then add another layer of cheese and ham before finishing with the other slice of bread. Spread about 1 teaspoon butter on each side of the sandwich and arrange it on a foil-lined cookie sheet. Bake in a preheated 375-degree oven for about 12 minutes, or until the croque-monsieur is brown and crusty on both sides. Cool for about 5 minutes. Trim off the crust if you like and cut into 6 small rectangles. Serve hot with toothpicks.


I'm linking this post with I Heart Cooking Clubs (IHCC), theme for this week 
"Fromage S'il Vous Plait!" (Cheese If You Please)